

Slab leaks tend to stay hidden until they’re already doing damage. If you’ve found signs of leaking water, it’s time to act fast, and it’s best to know what to expect. Slab leak repair timelines, costs, and what the process actually looks like—these are some of the things we’ll discuss. Leak Chasers is here to make addressing slab leaks less stressful, helping you keep your home’s structural integrity intact.
What Is Slab Leak Repair?
Underneath many Oklahoma homes, there’s a concrete slab foundation. And right under that slab (or sometimes inside it), you’ll find your home’s water lines. When one of those water pipes beneath cracks, corrodes, or shifts and starts leaking, that’s what we call a slab leak.
Related Article: The Importance of Timely Repairs To Slab Leaks
The problem is, these broken pipes usually create hidden leaks. So instead of easily finding water escaping from a crack, you might get soggy flooring, low water pressure, moldy smells, or worse, damage to the foundation of your home.
What Causes a Slab Leak?
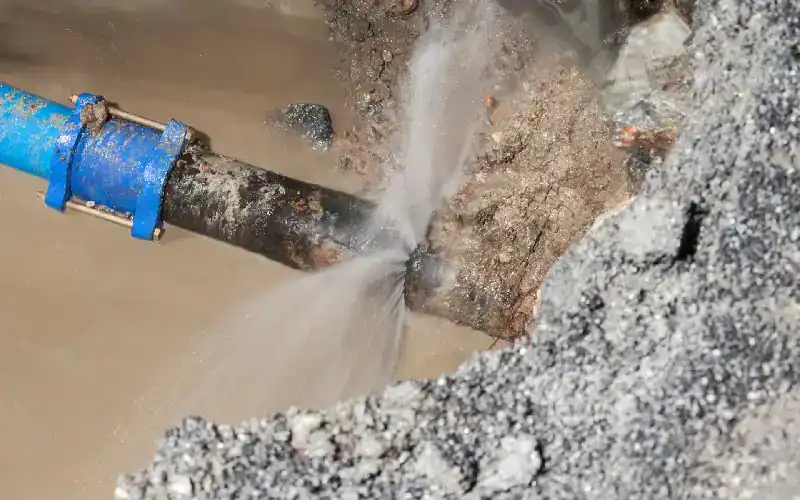
These are the most common causes of slab leaks in Oklahoma City:
- Old pipes: A lot of homes in OKC still have copper or galvanized steel pipes. Over time, those materials break down, especially when exposed to Oklahoma’s mineral-heavy soil. This can lead to issues like pipe corrosion and pipe splitting.
- Soil erosion or movement: Red dirt expands when it gets wet and shrinks when it dries out. That movement puts stress on pipes, and over time, they can crack.
- Improper installation: If the pipes weren’t laid properly when the home was built (maybe they were kinked or forced into awkward shapes), they’re more likely to fail.
- Excessive water pressure: Too much pressure can put stress on your plumbing system and eventually wear it out, which is why it’s important to monitor water pressure.
How Much Do Slab Leak Repairs Usually Cost?
Got a leak under your concrete foundation? The cost depends on the details of your project. Based on 2025 data, slab leak repairs cost somewhere between $630-$4,400 on average.
For an accurate estimate, we recommend getting a free quote from our team at Leak Chasers.
How Long Does Slab Leak Repair Take?
The process of repairing slab leaks usually takes more than just a few hours. More specifically, most repairs fall within the 1-3 day range. If pipe rerouting is involved, it could take a bit longer, up to 4-5 days total. This is especially true if multiple areas of the home need plumbing re-runs.
Different Types of Plumbing Materials

Got a damaged pipe? Knowing what kind of pipes you’ve got under the house, as well as other material choices in the market, can help you understand your options for repair.
Copper Pipes
This is used in many older homes. Strong and durable, but sensitive to corrosion, especially in areas with acidic or mineral-rich soil. Copper is also more expensive to repair or replace.
PEX (Cross-linked Polyethylene) or Plastic Pipes
This is the gold standard in newer homes and modern repiping jobs. Flexible, durable, and corrosion resistant. If your plumber recommends rerouting with PEX, they’re probably doing you a favor.
Galvanized Steel and Cast Iron Pipes
Mostly phased out today, but still lurking in some old builds. These pipes corrode on the inside and cause water pressure issues over time.
PVC and CPVC
Not typically used for pressurized water under slabs, but you might find these in drain or vent lines. Affordable but not great under concrete.
Concrete Slab Leak Detection Methods
Professional slab leak detection lets us find the exact location of the leak in your water line or plumbing system. These are some of the most common methods in slab leak detection:
- Listening equipment or electronic leak detection: Technicians use sensitive devices to “hear” the sound of water moving under your slab.
- Infrared cameras or thermal imaging: Warm water leaks leave heat patterns. Thermal imaging cameras can spot these through the flooring and drywall.
- Pressure testing: By isolating sections of your water system and running air pressure tests, techs can pinpoint leaks without cutting anything open.
- Pipe cameras: This method involves inserting cameras into the pipes to get a close look at what’s happening inside. This process is usually used when rerouting or doing major repairs.
Slab Leak Repair Methods
Whether you’re dealing with extensive damage or something more minor, there’s a specific slab leak repair method that might work best for your specific situation.
Spot Repair (Dig and Fix)
If the leak is in one small area and the rest of the plumbing looks solid, the team will cut through the slab, expose the pipe, fix the leak, and patch the concrete. It’s the most direct method and works great for isolated issues.
Expoxy Pipe Lining
Also called epoxy lining. This trenchless method involves coating the inside of the damaged pipe with resin, which hardens and seals off leaks. Less invasive, but not suitable for all pipe types or badly corroded lines.
Pipe Rerouting
If the pipe under the slab is toast or there are multiple leaks, it may make more sense to just abandon that line and install new pipes through the attic or walls. It’s a bigger job, but it gives you modern pipes and more reliability. Usually best for isolated leaks.
Pipe Bursting
This trenchless option pulls a new pipe through the old one while breaking it up. It’s fast and doesn’t require digging through the entire slab, but it does need space at both ends of the pipe.
The Typical Slab Leak Repair Process

With the right team and tools, the slab leak repair process can be smooth and involve minimal disruption to your daily life. Below is a simple breakdown of what usually happens, depending on the chosen repair method.
- You notice something’s off. Maybe the floor feels warm, your water bill spikes, or your baseboards are mysteriously soggy. You call Leak Chasers and get a free estimate.
- A tech comes out with all the right tools and figures out exactly where the leak is using an appropriate leak detection method.
- You’ll get a breakdown of the problem, the recommended solution, and clear pricing.
- Whether it’s a spot repair, reroute, or relining job, the crew gets to work. They protect your floors, clean up as they go, and make sure everything is working perfectly before moving on.
- Once the fix is complete and the system is tested, they’ll patch the concrete. You might need to schedule separate flooring repairs, depending on the material.
- Leak Chasers does a follow-up to make sure everything is solid, the pressure’s holding, and there are no signs of any new issues.
Preventative Measures to Avoid Future Slab Leaks
Regular maintenance can prevent slab leaks and the issues that come with them, like mold growth, soil expansion, and foundation cracks. With a proactive approach, you can keep water leaks from happening in the first place and avoid costly repairs.
- Keep water pressure in check. Get a pressure regulator installed if you haven’t already.
- Have your plumbing inspected every year or two. A quick checkup can spot early signs of trouble.
- Watch for spikes in your water bill. That’s usually your first sign something’s leaking.
- Control moisture around your home’s foundation. This helps prevent soil shifting and pipe stress.
- If your home is older and still has galvanized or aging copper pipes, consider repiping sections with PEX.
Call Leak Chasers for Early Detection
Slab leaks can be tricky, but with the right approach, they can be effectively repaired. From the visual inspection to the final fix, our experienced techs will guide you through the entire process to make sure everything is properly addressed, including any affected plumbing fixtures and plumbing lines. Catching potential slab leak issues early helps you avoid bigger problems, like water damage or future leaks.
If you suspect anything unusual, don’t wait. Reach out to our trusted experts for proper slab leak repair today!