

That drip, drip, drip from your shower is not just annoying. It wastes water, raises your utility bill, and often points to a problem that will only get worse if ignored. Even a small leak can turn into moisture damage over time.
At Leak Chasers, we help Oklahoma City homeowners track down leaks of every size. While we are always here for complex plumbing trouble, we also believe people should feel confident tackling simple repairs. This guide walks you through how to diagnose the issue and fix it correctly, without unnecessary steps or confusion.
What’s Actually Causing Your Leak?

A shower head leaking might seem like a surface problem, but timing and location matter. Before you try to fix a leaky shower head, take a minute to observe what happens during use and after the water is turned off. That quick check often reveals whether the issue is simple or a sign of deeper trouble.
Common leak scenarios include:
- Drips after turning off the water
This usually points to wear inside the faucet valve, often related to the shower cartridge inside the wall. - Leaks at the connection point
This means the seal between the shower arm and shower head is failing. - Water behind the wall plate
This may indicate loose fittings or a problem with the faucet body. - Spraying from the head itself
Cracks or internal damage mean the head needs replacement.
Once you identify the source, the repair process becomes much more straightforward.
Mineral buildup, worn O-rings, loose threads, and aging internal parts are the most common causes. Hard water speeds up wear, which is why leaks often appear sooner than expected.
What You’ll Need
Before starting, gather everything you need so the repair goes smoothly. Nothing slows progress like stopping mid-project to hunt for parts. Having tools and materials ready is how to fix leaking shower head efficiently.
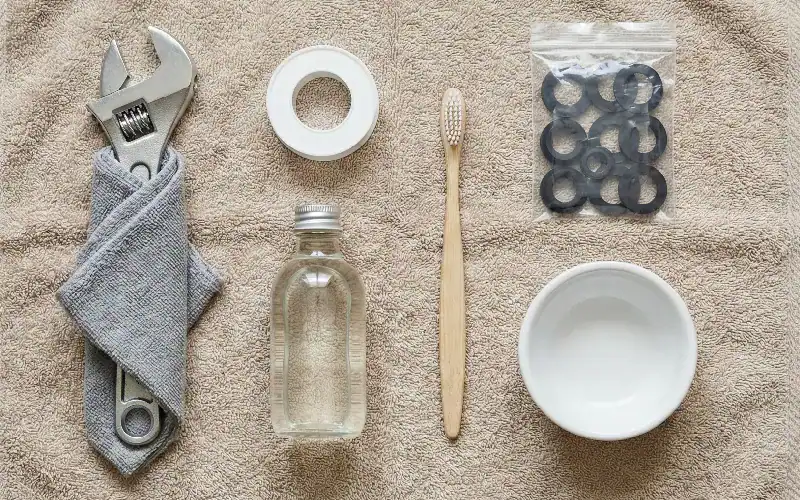
Tools
- Adjustable wrench or pliers
- Old toothbrush
- Soft cloth
- Bowl
Materials
- Teflon tape
- White vinegar
- Replacement washers
- New shower head, optional
Once everything is laid out, you can focus on the repair instead of interruptions.
Safety First
Even small plumbing jobs deserve basic precautions. Before touching the showerhead, locate the shutoff valve for the bathroom. If you cannot find it, shut off the main water supply temporarily.
Turn the handle to release any remaining pressure. This step matters because pressure trapped in the system can cause unexpected sprays or drips.
Protect the drain with a towel to catch small parts. Wrap your wrench with a cloth to avoid scratching finishes. These steps prevent damage while keeping the work area under control.
With water off and surfaces protected, you are ready to start.
The Fix: 5 Simple Steps
Before you start turning parts, take a moment to prep the space. Lay down a towel to cover the tub and drain so small pieces do not disappear. If you notice water lingering or dripping post-shower, dry everything off first. That makes it easier to spot leaks once you turn the water back on. These steps are designed to help you stop dripping at the source, not just hide the problem. While this guide focuses on the shower itself, keep in mind that pressure issues from the whole house plumbing system can sometimes play a role, so pay attention to anything that feels out of the ordinary.
Step 1: Remove the Shower Head
To fix a leaky shower head properly, you need full access to the threads and internal seals.
Turn the connection nut counterclockwise where it meets the shower arm. Try by hand first. If it will not budge, use a wrench with a cloth barrier.
For hand-held models, disconnect the hose from both the shower arm and the tub spout, paying attention to how the fittings come apart.
Once removed, inspect the threads. Old tape, corrosion, or buildup often explains the leak. Use the toothbrush to scrub away residue so you are working with a clean connection.
Step 2: Deep Clean Everything
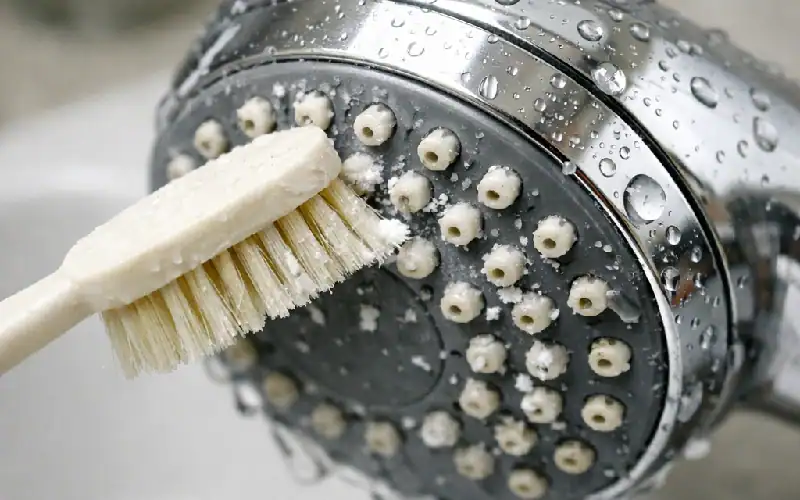
Mineral buildup causes more leaks than most homeowners realize. Deposits interfere with seals and prevent parts from sitting correctly.
Place the showerhead face down in a bowl of white vinegar and allow it to soak for 30 to 60 minutes. This dissolves limescale without harsh chemicals.
After soaking, scrub the nozzles and internal openings with your toothbrush. Rinse thoroughly, then wipe the surface dry with a soft cloth.
While cleaning, inspect the head carefully. Even small cracks mean replacement is the better option.
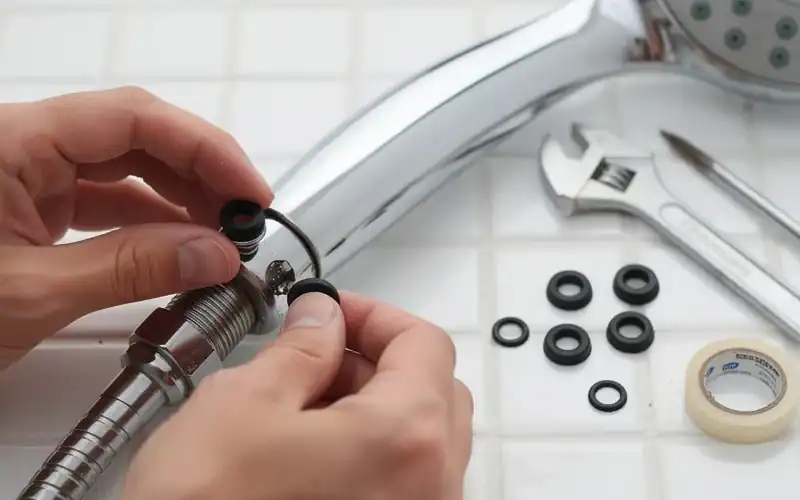
Step 3: Replace Worn Seals
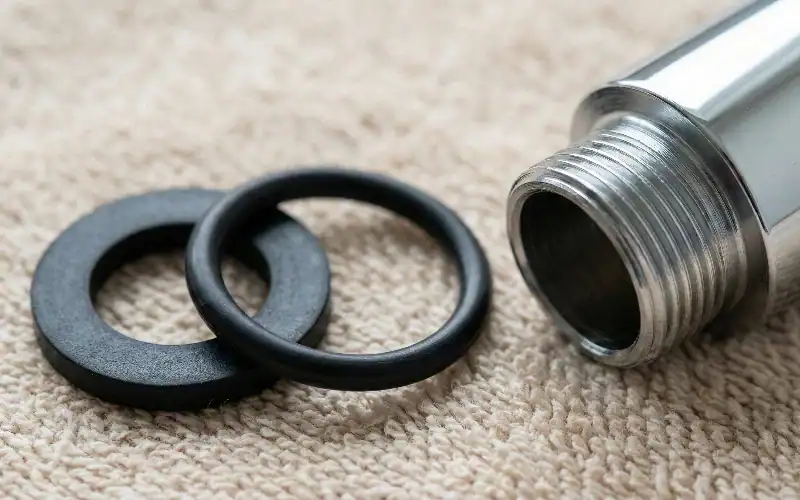
Inside the showerhead connection, you will find a washer or O-ring that creates the seal. Heat and pressure cause these parts to dry out, flatten, or crack.
Remove the old seal and match it exactly at the store. Installing the wrong size often leads to continued leaks.
Installation tips:
- Confirm the correct size
- Seat it flat in its groove
- Avoid stretching the material
- Center it carefully
A properly installed seal prevents water from escaping at the connection point.
Step 4: Apply Thread Sealing Tape

Thread tape is essential for preventing leaks along the pipe threads. Skipping this step is one of the most common mistakes.
Wrap the tape clockwise around the shower arm threads so it tightens as the head is installed. Use three to four wraps and smooth them down with your finger. Keep tape off the pipe opening to avoid blocking the flow.
With sealed threads, the connection is far more reliable.
Step 5: Reinstall and Test

Thread the showerhead on by hand first, then snug it gently with a wrench. Stop when you feel firm resistance. Overtightening damages threads and compresses seals too much.
Turn the water on slowly and test carefully. Check for:
- Drips from the showerhead face
- Leaks at the connection
- Moisture behind the wall plate
Run both hot and cold water. Some leaks only appear on the hot side due to expansion. If you notice moisture, remove and reinstall, checking tape direction and seal placement.
Still Dripping? The Problem’s Deeper
If cleaning and seal replacement do not stop the leak, the issue is likely inside the wall. A failing shower cartridge inside the valve allows water to pass even when the handle is off.
Signs of cartridge failure include:
- Continuous dripping long after shutoff
- Handle stiffness
- Temperature instability
- Moisture around the faucet valve
At this stage, the problem is no longer limited to the showerhead.
Should You Replace It Yourself?
Replacing a cartridge involves removing the handle, trim, and accessing the faucet body. Each brand uses a different design, and orientation is critical.
The general process includes shutting off house water, removing trim, pulling the cartridge, installing the new one correctly, and reassembling everything.
Here is our honest advice. If you are not confident working inside the wall, this is the point to stop and call a licensed plumber. Mistakes here can lead to hidden leaks and serious water damage.
When to Call the Pros

Some situations should not be handled DIY. Call for professional help if:
- Water is leaking from inside the wall
- You see stains on the ceiling below the bathroom
- Water pressure changes throughout the house
- The valve components look corroded
- You have tried everything, and the leak continues
Persistent leaks often signal pressure issues or pipe damage that require proper diagnostics by a general plumbing service.
Prevent Future Leaks
Most shower leaks develop slowly. A little maintenance goes a long way.
- Monthly vinegar cleaning
- Hard water treatment when needed
- Quarterly moisture checks
- Early attention to small drips
- Monitoring water pressure
- Replacing aging fixtures
- Choosing quality washers and seals
These habits reduce repeat repairs and extend the life of your plumbing.
Stop That Drip Today
Fixing a leaking shower head is one of the most satisfying DIY wins. With basic tools and a little patience, most homeowners can solve the problem and avoid ongoing trouble.
If the leak continues or points to something deeper, Leak Chasers is here to help. We handle everything from fixture repairs to full plumbing diagnostics across Oklahoma City.
Call (405) 751-7777 or visit 3030 Northwest Expy, Suite 455, Oklahoma City, OK 73112.
Do not let a small leak turn into water damage. Whether you handle it yourself or bring in the pros, take action today.